Here is the shortened but complete list of instructions’ for posting the new issue on the main MRR website. Detailed instructions with screen shots are below.
- Create web-ready’ JPEGs of the cover using the instructions’ HERE
- Log in to the MRR dashboard
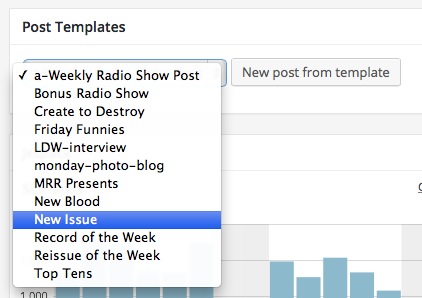
- Under Post Templates select “New Issue”
- Put current issue number and date into post title
- Change permalink name to this format: mrr-386
- In Text mode select the first paragraph block and insert the cover image (upload the small version as well, but don't place it in the post)
- Paste the’ write-up into the 2nd paragraph block
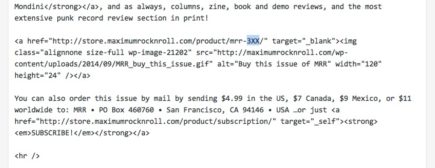
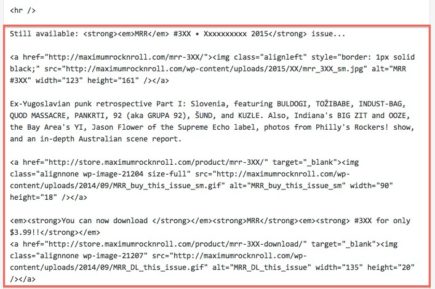
- In the 3rd paragraph block replace’ “3XX” with’ the current issue number
- Starting with the “Still available:” line, paste in the previous issue info from last month's “Write up etc” ’ file
- SAVE the draft and preview the post
- Switch to Visual mode’ and add bold/italic formatting and links
- Under “Visibility:’ Public” on the right, click Edit and CHECK’ Stick this post to the front page
- Under “Publicize:” on the right, UNCHECK’ Facebook
- Save draft and preview. Make corrections if necessary and save again – make sure it's 100% ready. DO NOT PUBLISH YET.
- Create and publish webstore posts for this issue and for previous’ issue PDF’ before’ clicking Publish on this post
- See the New Issue Checklist for the remainder of the new issue tasks
NEW ISSUE POSTING INSTRUCTIONS:
LONG VERSION
1. First, create web-ready’ JPEGs of the cover using the instructions at
radio.maximumrocknroll.com/info/new-issue-cover-jpegs
2. Next, log in to the MRR WordPress dashboard, then…
3. Under Post Templates select “New Issue” and click “New post from template”
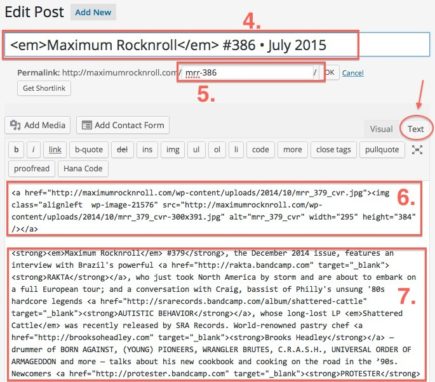
4. Put current issue number and date into post title (abbreviate months over 5 letters long so that the post title fits on one line)
5. Change permalink name to this format: mrr-386 ’ and click OK
6. Insert the cover image you created in step 1:
In Text mode (not Visual – see the tabs in the upper-right) select the first paragraph block and click “Add Media”
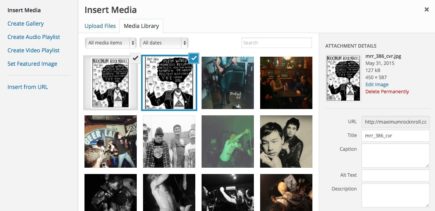
Click on “Upload Files” then “Select Files” and choose’ mrr_386_cvr.jpg and’ mrr_386_sm.jpg, or you can drag the files from your computer into the Insert Media window
Uncheck the mrr_386_sm.jpg file so that only’ mrr_386_cvr.jpg is selected

On the right scroll down to ATTACHMENT DISPLAY SETTINGS, choose:
Alignment: Left
Link To: Media File
Size: Medium
and click “Insert & set featured image”
7. Paste the’ write-up into the 2nd paragraph block,’ leaving’ one’ line of space between the write-up and the image code above it
8.’ In the 3rd paragraph block’ (the one right after the write-up)’ replace’ “3XX” with’ the’ current issue number. This links the “Buy this issue” button to the webstore post.
9. For the whole end of the post starting with the “Still available:” line, paste in the previous issue info from last month's “Write up etc” file (the section labeled’ BOTTOM OF NEXT MONTH'S NEW ISSUE POST in the “write up etc” file)
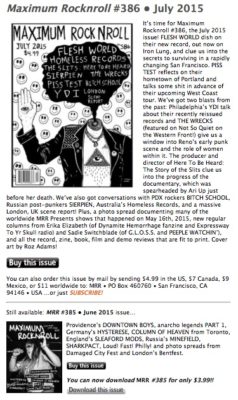
10. Click Save Draft’ and preview the post. It should look like this:
11. Now switch to’ Visual’ mode (in the upper right tabs) and add bold/italic’ formatting and links to the write-up’ where applicable. (I have not been’ adding formatting to the previous issue description at the bottom of this post, but you can if you'd like. –PC)
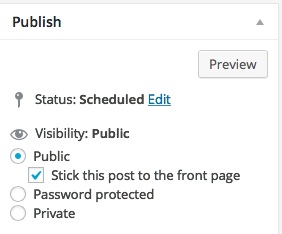
12. In the Publish pane on the right, under “Visibility:’ Public”, click Edit and CHECK’ Stick this post to the front page
13. Under “Publicize:” ’ UNCHECK’ Facebook:’ Maximum’ Rocknroll. (We want to manually post this to Facebook, not auto-post as we do with our usual blog entries.)
14. Click’ Save Draft’ and preview the post. Make sure it's 100% ready to go because you will be copying this post to the webstore.* Save your draft again when you are done making corrections. DO NOT PUBLISH yet because the links to’ the webstore will not work until you create those products in the store.
*After this, if any changes or corrections need to be made to the write-up, you'll have be sure to change it on both the main site and webstore posts.
15. Create and publish’ webstore posts’ for this issue and for the PDF of the previous’ issue’ – instructions here –’ then come back and click Publish on this post
16. See the New Issue Checklist for the remainder of the new issue tasks

